You watered your favourite orchid on Sunday and everything looked fine. By Thursday there are tiny white tufts in the leaf joints, the leaves look dull, and a sticky film has appeared on the shelf below. Those cotton-wool clumps are mealybugs — and if you have ever found them on a houseplant, you know the sinking feeling. The good news is that mealybugs are beatable. With the right order of steps and a bit of persistence, you can clear them completely and keep them from coming back. This guide shows you exactly how, using methods that work in real British homes and greenhouses.
What are mealybugs? How to spot them
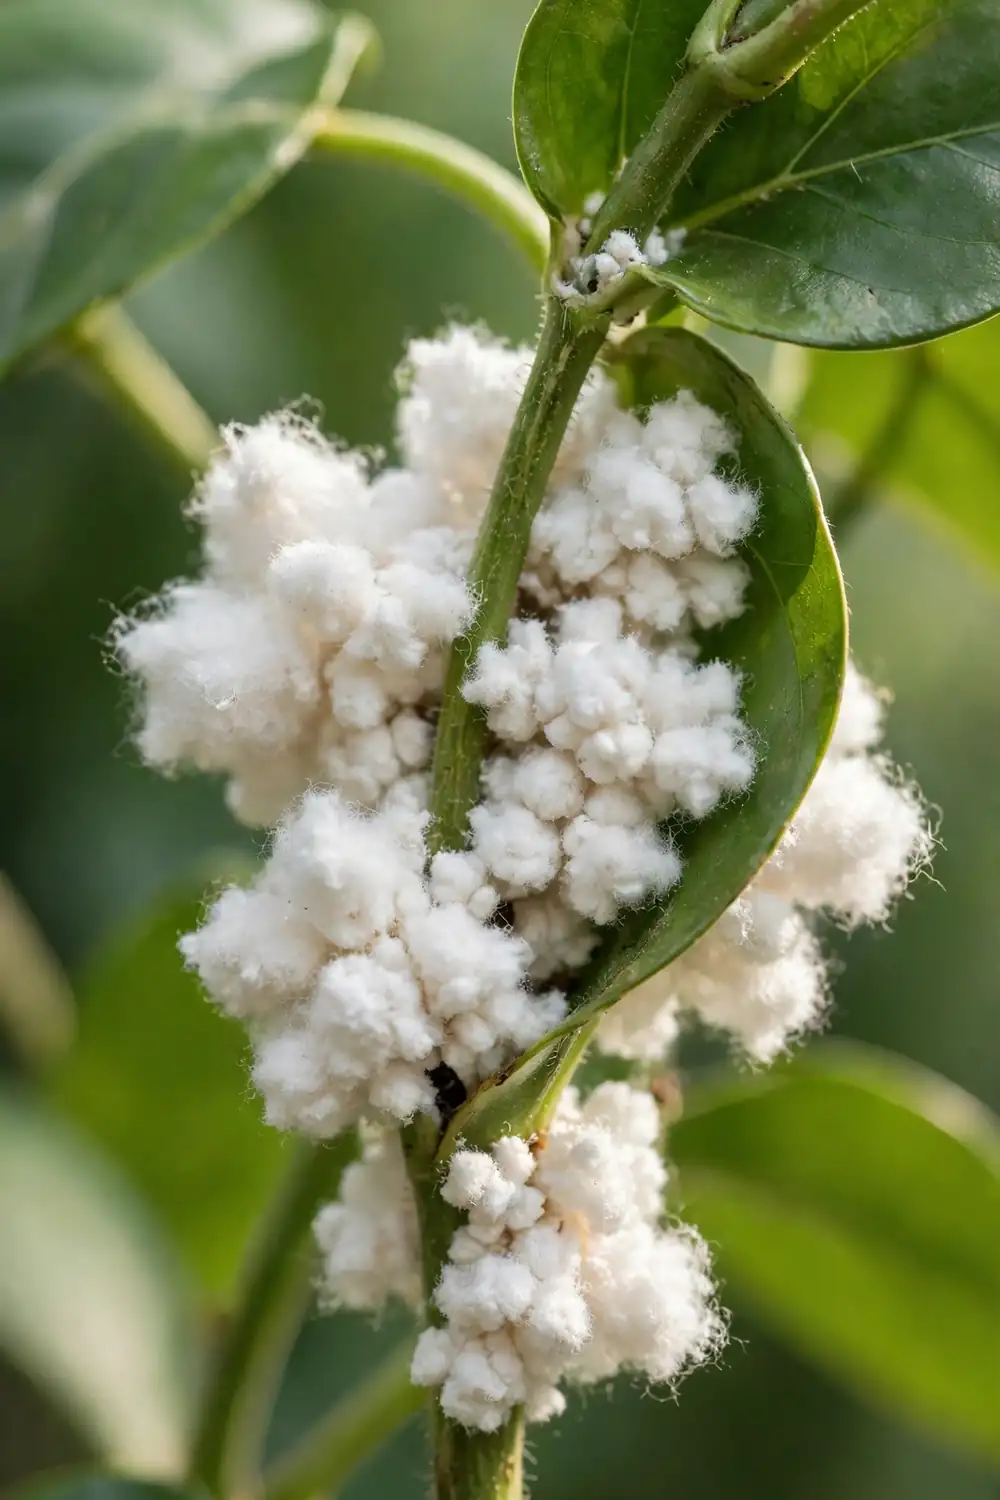
Mealybugs are small, soft-bodied, sap-sucking insects wrapped in a white waxy coating that looks like cotton wool or flour. They are close relatives of scale insects, and in the UK they are mostly a problem on houseplants and greenhouse plants, where the warm, sheltered conditions let them stay active all year round. Outdoors in Britain they are rarely a serious problem, because cold weather and natural predators keep their numbers down.
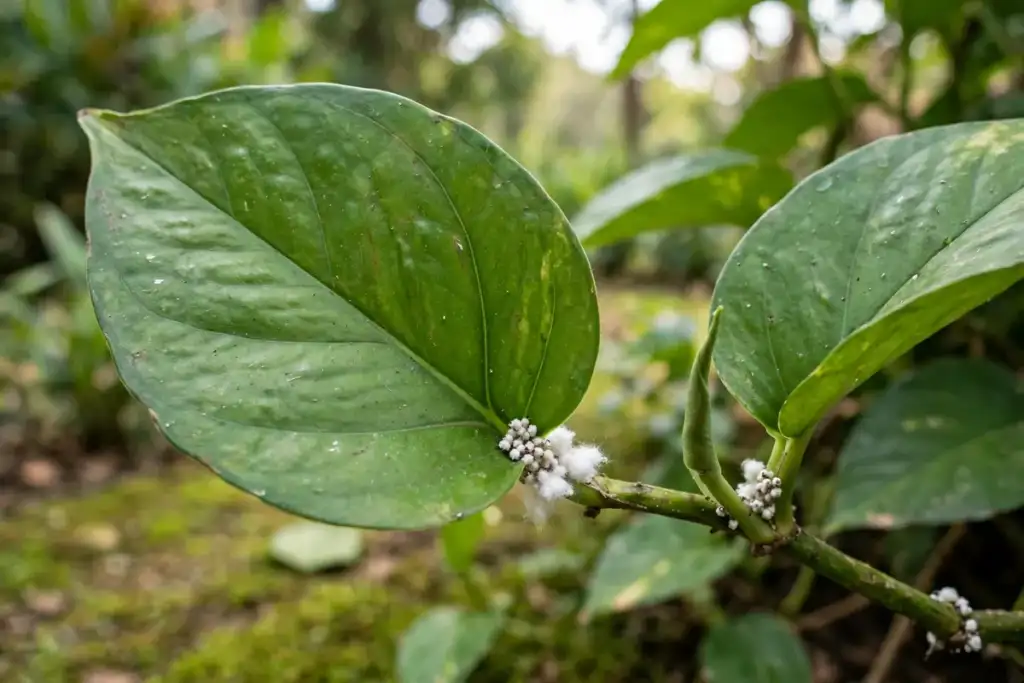
The first sign is usually the wax itself. Look for fluffy, woolly-looking coverings tucked into the places you do not normally inspect: leaf axils where the leaf meets the stem, stem joints, under loose bark on older stems, between twining stems, and sometimes even on the roots. The insects cluster together in these protected spots, and a colony can look like a dab of cotton wool stuck to the plant. Adult females are slow-moving or almost still, and they cannot fly — but the newly hatched crawlers are tiny, pale and mobile, and they are the ones that spread an infestation to the next leaf and the next plant.
There are several species you may meet indoors. The RHS names three kinds commonly found on houseplants: the citrus mealybug (Planococcus citri), the long-tailed mealybug (Pseudococcus longispinus) and the glasshouse mealybug (Pseudococcus calceolariae), though other species turn up too. Glasshouse mealybugs — the group that includes Pseudococcus, Planococcus and Nippaecoccus — mostly come from the tropics and only survive here in protected environments, which is why they love a warm living room or a heated greenhouse. Root mealybugs (Rhizoecus) are a separate problem: they build up into dense colonies on the roots, hidden under the compost, and you may only notice them when a plant wilts for no obvious reason.
Some plants are more prone to mealybug infestations than others. Cacti and succulents, African violets, ferns and orchids are particularly vulnerable, and the RHS also lists bougainvillea, citrus, fuchsia, grape vines, hoya, oleander, passion flower, peach and tomato among their hosts. If you keep any of these, they deserve a quick check every time you water.
Mealybugs feed by piercing the plant and sucking out sap, and the damage shows up gradually. Yellow leaves, stunted growth, new shoots that emerge distorted, and badly affected plants that wilt and drop leaves. As they feed they leave behind honeydew, a sticky sugary liquid that coats the leaves below and the surface the pot stands on. Honeydew then attracts sooty mould, a black fungus that grows on the sticky film and blocks light from the leaves. Ants are often part of the picture too — they farm mealybugs for their honeydew and will protect a colony from predators, so a trail of ants on a houseplant is worth investigating. None of this kills a plant overnight, but left alone for months, a heavy infestation will weaken it badly.
First, isolate the plant: the 30-minute response
Before you reach for any spray, do the one thing that matters most: isolate the infected plant. Move it away from every other plant, ideally into a separate room, whether your plants live in a London flat or a heated greenhouse. Mealybugs crawl slowly, but crawlers drift and hitch rides on hands, sleeves and tools, and they spread before you notice them. Even a few inches of separation helps, but a different room is far better than the other end of the same shelf. Keep the plant there until four clean weeks have passed with no sign of the pest.
Next, inspect it properly. Turn every leaf over and look at the leaf undersides. Peer into every leaf axil and along the stems, around the pot rim and under the saucer. Check neighbouring plants too — inspect stems, leaf undersides and new growth on every plant that stood nearby, because pests spread before you notice them. Wash your hands and wipe down any pruning shears or plant stakes you touched, since mealybugs hitch rides easily. Taking a photo of the infestation now is useful as well: it lets you compare in a week’s time and see honestly whether your treatment is working.
Be realistic about the scale of the problem. A few clusters on one plant are very treatable. A plant smothered in wax on every stem, with yellow leaves and a black coating of sooty mould, may be better discarded — eradicating mealybug requires persistence, and it is sometimes kinder to discard badly infested plants than to spend months treating them while they risk the rest of your collection. That is not defeat; it is good plant hygiene. Bag the plant, bin it (do not compost it), and focus your energy on the plants you can save.
7 ways to get rid of mealybugs that actually work
There is no single magic spray for mealybugs. Their white waxy coating repels water and most contact insecticides, and their eggs sit protected inside cottony sacs, hatching days or weeks later. That is why the order matters: first isolate infected plants, then remove what you can see, treat what remains, and repeat treatment on a schedule that catches the next generation. Here are the seven methods that work, in the order you should use them.
1. Rubbing alcohol on a cotton bud: the most reliable first step
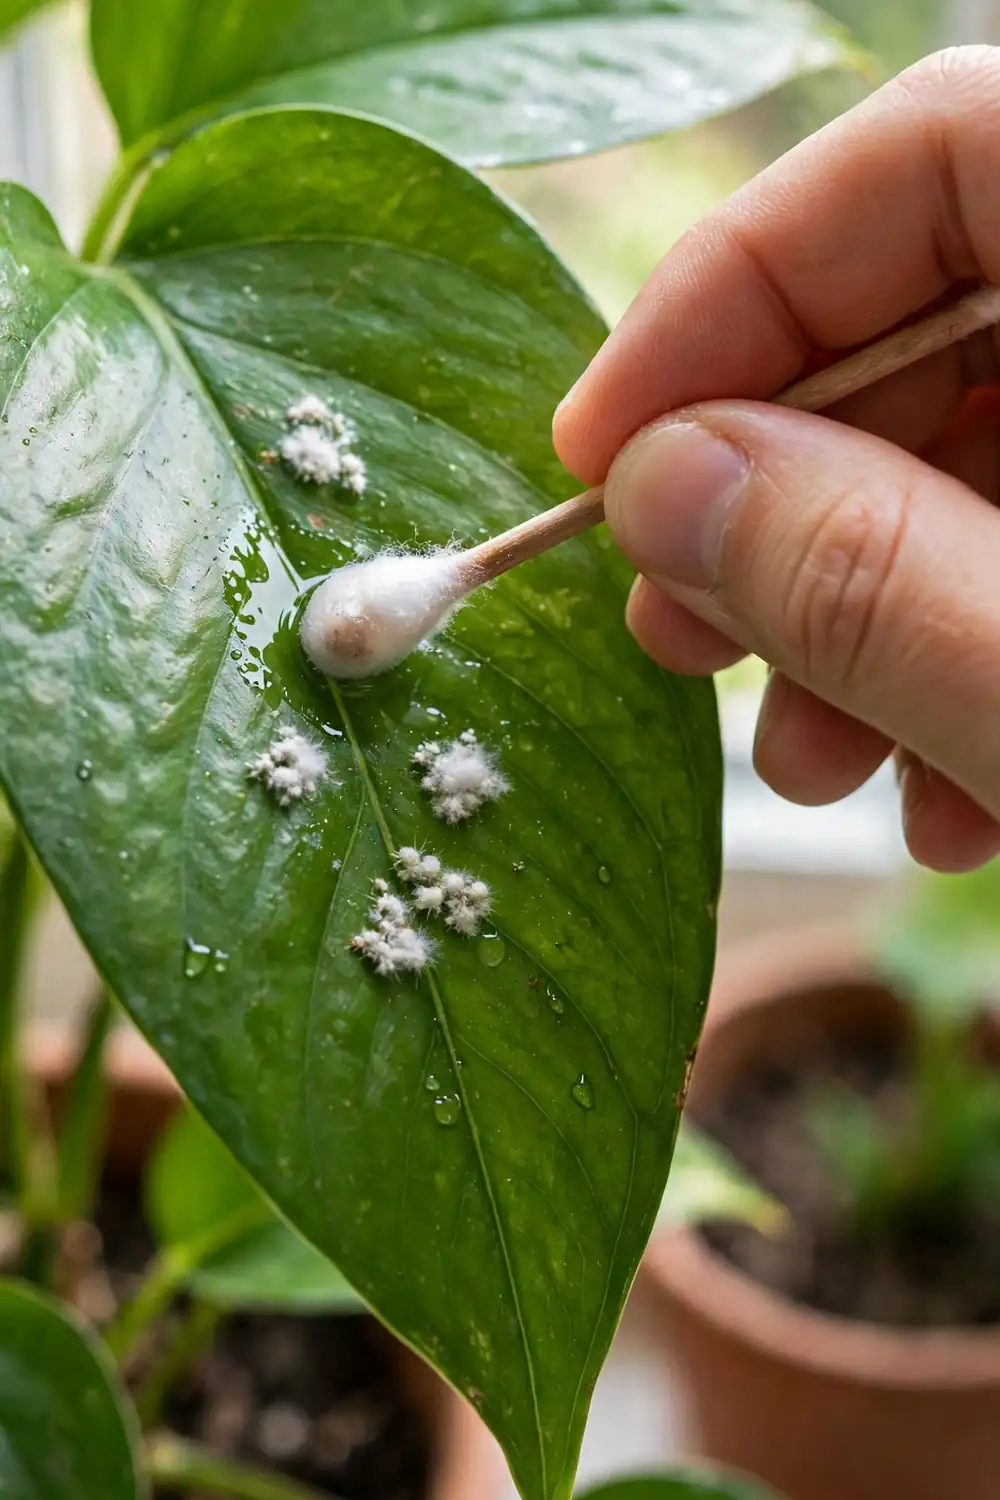
For small infestations, nothing beats a cotton bud dipped in rubbing alcohol. Use a solution of 70% isopropyl alcohol or weaker — the same rubbing alcohol sold in pharmacies — and touch the bud to each colony. The alcohol dissolves the insect’s protective waxy coating and kills it on contact, and because you are dabbing rather than spraying, nothing lands on the rest of the leaf. Twist the bud as you go, work through every crevice, and check the leaf axils, stem joints and the undersides of leaves, where the insects squeeze into impossibly tight spaces.
Test on a single leaf a day or two before you treat the whole plant, to make sure the alcohol does not burn the leaf. Succulents such as jade or echeveria can be sensitive, so a 24-hour patch test is worth the wait. For larger infestations you can make a DIY rubbing alcohol spray: mix one cup of rubbing alcohol with one tablespoon of mild liquid soap and a quart of water, spray the affected leaves until moist, and repeat every three days for two weeks. This is the safest method for delicate plants, and it is the first thing most experienced growers reach for.
2. Wash them off: the shower and hose method
Plain water is your friend, and it is the cheapest treatment of all. Take small houseplants to the shower or the sink and spray the foliage from several angles with lukewarm water — not hot, which scorches leaves, and not cold, which shocks the roots. Aim for a firm but not blasting pressure: you are trying to dislodge insects and wash away honeydew, not shred the leaves. Pay special attention to leaf undersides and stem joints, where the pests hide. Let the plant drain completely before returning it to its spot, and repeat every three to four days for two weeks.
For larger plants, or plants kept in a greenhouse, hose down the foliage with a strong jet from a garden hose or a watering can — take the plant outside if the weather is mild enough and spray it down thoroughly. This shower method works best as a first pass before the cotton bud or a spray. Follow it with a wipe-down: dip a soft cloth in water with a drop of washing-up liquid and wipe the leaves clean. This takes off honeydew and sooty mould and lets you see clearly what is left to treat.
3. Insecticidal soap spray
Insecticidal soap is one of the most useful treatments for soft-bodied insects, and mealybugs are no exception. These soaps contain potassium fatty acids that penetrate the insect’s soft shell and break down its cell membranes. You can buy a ready-made spray from a garden centre, or make your own with a small splash of washing-up liquid or pure liquid soap in a quart of water — keep the soap mild and the dose small, because too much soap can damage leaves.
Spray until the plant is drenched, making sure to coat the undersides of leaves and the stem joints, and repeat every seven to ten days until all signs of mealybugs are gone. Soap sprays only work on contact, so thorough coverage is everything: a leaf you miss is a leaf where the colony survives. Do not apply soap or oil sprays if the plant is water-stressed and wilting, or in temperatures above about 32°C, as this can damage plant tissue. And as with alcohol, test on a few leaves first and keep the treated plant out of strong direct sun for a day.
4. Neem oil: the organic all-rounder
Neem oil is a natural, organic treatment made from the seeds of the neem tree, and it is widely used against mealybugs on houseplants and in greenhouses. It works in two ways: it coats the insects and blocks their breathing holes, suffocating them, and it contains azadirachtin, a compound that interferes with the insects’ hormones, stopping them from feeding and maturing. It also has a mild systemic and repellent effect, making the plant less attractive to mealybugs in future.
To use it, mix one tablespoon of neem oil with one tablespoon of mild liquid soap in a gallon of water, or follow the label on a ready-made spray, and coat the plant thoroughly — including the undersides of leaves and the leaf axils, where eggs hide. Repeat once a week until you no longer see mealybugs. Be honest about its limits: neem oil kills or suppresses the mealybugs it coats directly and works best on young crawlers and nymphs that have not yet built up much wax. Eggs inside cottony sacs are protected and hatch later, which is why repeat applications matter. Never exceed the label rate — stronger mixes can burn leaves — and spray in the early morning or late evening, keeping treated plants out of direct afternoon sun for 24 hours to prevent foliage scorch.
5. Homemade sprays: garlic, vinegar and baking soda — an honest verdict
The internet is full of kitchen-cupboard cures for mealybugs, and some of them genuinely help while others are best left in the cupboard. Here is the honest verdict on the three you will see most often.
Garlic spray is the most useful of the three. Simmer a whole head of garlic, lightly smashed, in a litre of water for half an hour until the liquid has reduced by about a third, leave it to cool overnight, strain it and dilute it at roughly one part garlic liquid to ten parts water. Sprayed onto affected plants, it acts as a mild repellent and contact treatment, and it is cheap and harmless to beneficial insects. It will not clear a heavy infestation on its own, but as part of a routine alongside the cotton bud and soap spray, it earns its place.
Vinegar is often recommended — mix equal parts vinegar and water and spray the affected areas — but use it with care. Vinegar is acidic enough to damage tender leaves, and a spray that is strong enough to kill mealybugs is often strong enough to scorch the plant too. If you try it, test on one leaf first, keep the mixture weak, and rinse the plant afterwards. For most people, rubbing alcohol does the same job more safely.
Baking soda is the weakest of the three. A paste of bicarbonate of soda and water painted onto affected areas can help dry out exposed insects, and it is harmless enough, but it does not penetrate the waxy coating reliably and it does nothing about eggs or crawlers hiding in crevices. Treat it as a supporting act, not the main treatment — and never rely on any single homemade spray without the repeat schedule below.
6. Prune the worst growth
Sometimes the fastest treatment is the secateurs. If a stem or a shoot is smothered in mealybugs, cut it out. Scrape, hose or brush off as many adults as you can from the parts you keep, and cut out badly affected shoots entirely. This is especially worth doing on plants with dense, twiggy growth, where sprays cannot reach into the middle of the plant. Pruning also opens up the plant, letting in light and air, which makes the remaining growth less inviting to the next generation of pests.
Bag the prunings immediately and bin them — do not drop them on the compost heap or leave them on the bench, where crawlers can wander off onto the next plant. Wipe the secateurs with rubbing alcohol between cuts and between plants. For a full guide to cutting back safely without harming the plant, see our article on how to prune hydrangeas, where the same clean-cut and clean-tool principles apply. And remember: pruning is a treatment, not a cure on its own. Always follow it with one of the sprays above, on schedule.
7. Biological control: let the predators do the work
If mealybugs get established in a heated greenhouse or a conservatory, biological control is the most elegant solution of all. Two natural enemies do the job brilliantly. Cryptolaemus montrouzieri, often called the mealybug destroyer, is a small black and orange ladybird from Australia whose larva looks rather similar to a mealybug but is about twice as big — and eats them hungrily. The other is Leptomastix dactylopii, a parasitic wasp about 3mm long that kills mealybugs by laying its eggs inside them.
Both are available to order from biological control suppliers in the UK and work best in a warm, enclosed space. Screen opening doors, windows and vents with fine netting so the adults do not escape, and remember that both controls thrive only in summer, when they need good light and temperatures above 21°C. Biological control is not a quick fix for a single windowsill plant — it is a strategy for a greenhouse or a large collection, where it can keep mealybugs suppressed season after season without a single chemical. For the average living room, the cotton bud and the spray bottle remain the practical answer.
Root mealybugs: the hidden problem
There is one form of mealybug that none of the treatments above will touch, because you cannot see it: root mealybug. These build up into dense colonies on the roots of greenhouse ornamentals and some houseplants, hidden under the compost. The plant above ground simply wilts, yellows and stops growing, and the usual response — more water — makes things worse, because keeping the compost moist actually deters root mealybug, though unfortunately it will not suit some of the most vulnerable plants, such as cacti and succulents that need dry conditions.
If a plant is wilting and nothing else explains it, check the root ball. Knock the plant out of its pot and look at the roots. If there is white wax between them, shake off the old compost, rinse the roots in lukewarm water, and repot in fresh compost in a scrubbed pot. Throw the old compost away — do not reuse it — and wash the pot thoroughly before it holds another plant. Affected plants often recover surprisingly well once the colony is gone, provided the roots are not too badly damaged. For general advice on keeping plants alive through setbacks like this, our guide on how to keep plants alive covers watering, light and feeding in more detail.
How to stop mealybugs coming back
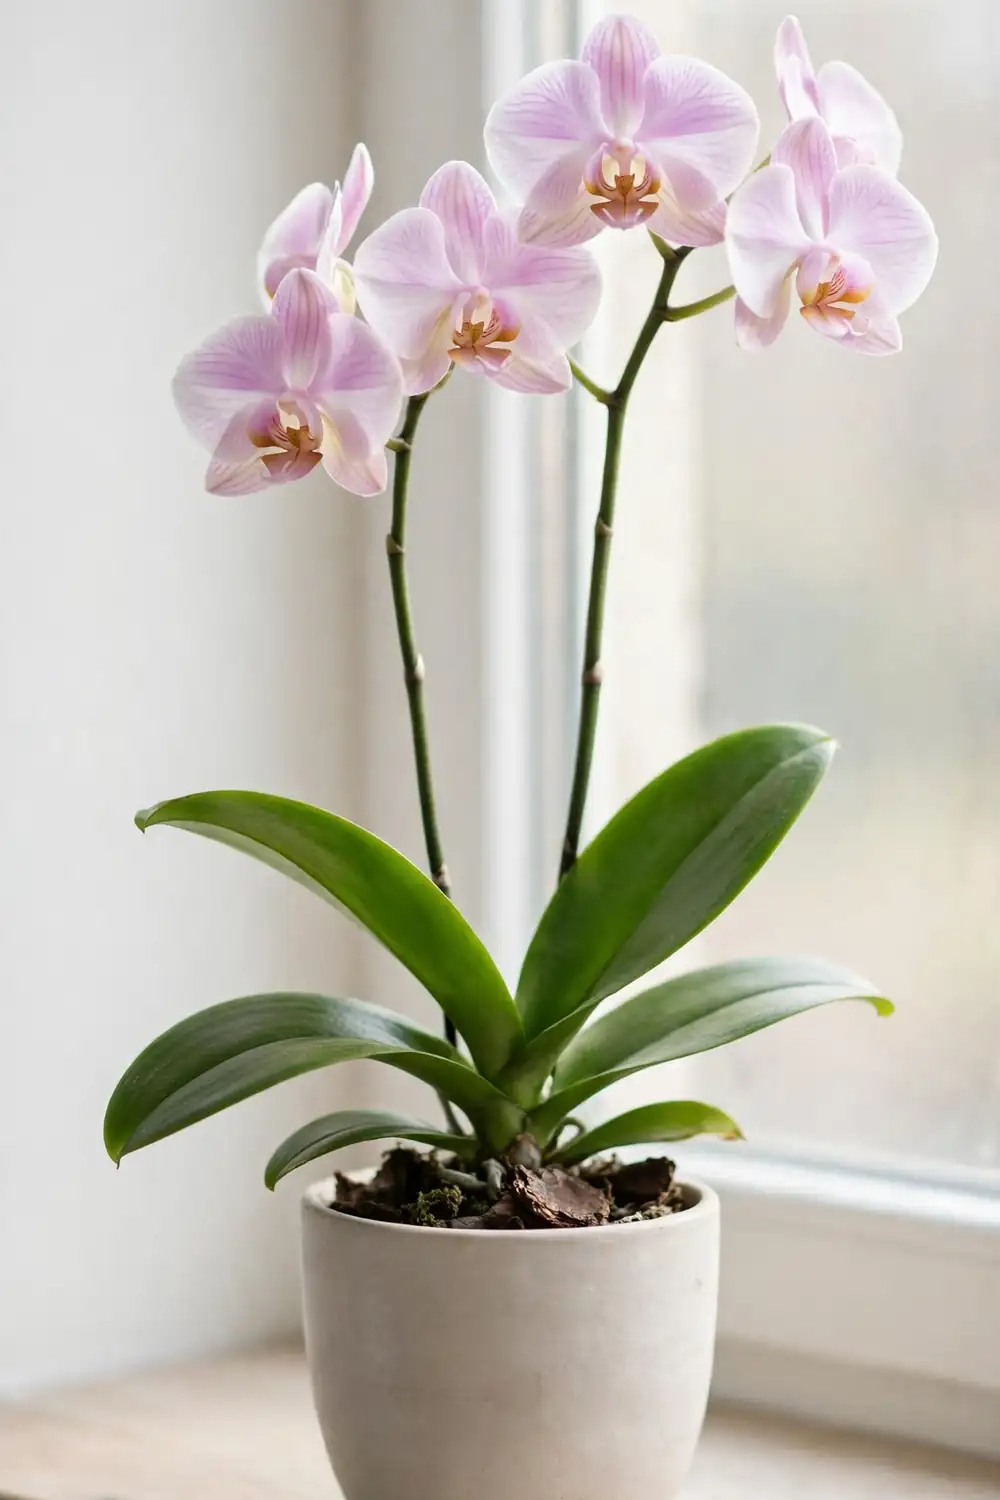
Clearing mealybugs is only half the job. The other half is making sure they do not return, and that comes down to a few habits that cost almost nothing.
Quarantine every new plant. Check new plants thoroughly before bringing them home, and keep them away from your collection for a month or so before mixing them with the others. Look under the leaves, into the leaf axils and around the pot rim while you are still in the shop — a plant that already carries a colony is not a bargain at any price. This single habit prevents more infestations than any spray ever will.
Inspect little and often. A weekly glance at your plants while you water is enough: turn a leaf or two, check the growing tips, and look for the first white tuft. Catching a colony when it is three insects instead of three hundred is the difference between a five-minute job with a cotton bud and a month of treatments.
Keep plants healthy and give them space. A stressed plant — too dry, too dark, or crammed against its neighbours — is more vulnerable to pests. Leave air circulation space around each plant, and prune back plants that have grown so large they touch each other, because one of the main ways mealybugs spread is through touch. Strip old bark off indoor vines in winter, which helps to dislodge incipient colonies before they establish. Keep the compost moist where the plant allows it, since this deters root mealybug, and deal with ants promptly, because ants protect mealybug colonies and carry crawlers to fresh plants. If you grow plants in shade, our guide to garden plants for shade includes several species that cope well with lower light and still stay vigorous enough to resist pests.
Finally, respect the repeat schedule. Whatever treatment you choose, repeat it. Treat your plant at least three or four times, a week apart, to catch newly hatched nymphs — the eggs you leave behind hatch in between treatments, and a single pass always misses them. Keep checking for six weeks after the last insect you see. If four clean weeks pass with no sign of mealybugs, you can move the plant back with the rest of your collection.
When to give up on a plant
Not every plant is worth saving, and knowing when to stop is part of good plant care. If a plant is heavily infested on every stem, has lost most of its leaves, and has not responded to three or four rounds of treatment, the kindest and most practical choice is to discard it. A dying plant in the middle of your collection is a reservoir of crawlers that will reinfest everything you have just cleaned. Bag it, bin it, scrub the shelf and the pot, and put the effort into the plants that are thriving. You can always replace the plant — you cannot easily replace a whole collection.
That said, do not give up too early. A plant with a small colony on one stem, or a plant that has been treated twice and is already looking better, is well worth the effort. Mealybugs are persistent, but they are also slow, visible and treatable. The growers who beat them are not the ones with the strongest chemicals — they are the ones who check weekly, treat on schedule, and quarantine every new arrival. For broader planting ideas once your collection is healthy again, our garden design ideas guide is a good place to start planning what grows where.
Mealybugs FAQ
What do mealybugs look like?
Mealybugs look like tiny white cotton-wool tufts stuck to a plant. They are small, soft-bodied insects covered in a white waxy coating, and they cluster in leaf axils, stem joints, under loose bark and sometimes on roots. The white fluff is the giveaway — if it looks like cotton wool and does not brush off like dust, suspect mealybugs.
How do I get rid of mealybugs permanently?
There is no one-spray permanent cure. The method that works is to isolate the plant, remove every visible colony with a cotton bud dipped in 70% rubbing alcohol, follow up with insecticidal soap or neem oil, and repeat the treatment every seven to ten days for at least four weeks to catch newly hatched crawlers. Then quarantine new plants for a month and inspect your collection weekly, so the next colony is caught when it is three insects instead of three hundred.
Does neem oil kill mealybugs?
Neem oil partly kills mealybugs: it smothers the insects it coats directly and its active compound, azadirachtin, disrupts their feeding and development. It works best on young crawlers and nymphs that have not yet built up much wax, and eggs inside cottony sacs are protected, so you need to repeat the spray weekly. Use it as part of a routine with the cotton-bud method, not as a single treatment on its own.
Can mealybugs spread to other plants?
Yes. Adult females crawl slowly, but newly hatched crawlers are mobile and spread through touch between plants, on hands, sleeves and tools, and on the wind in a greenhouse. That is why the first step in any treatment is to isolate the infected plant in a separate room and to inspect every neighbouring plant, including their leaf undersides and new growth.
Should I throw away a plant with mealybugs?
Only if the infestation is severe. A plant smothered in wax on every stem, with yellowing leaves and heavy sooty mould, is often better discarded than treated for months — it risks reinfesting your whole collection. A plant with a small colony on one or two stems is very treatable: isolate it, dab the insects off with rubbing alcohol, spray on schedule, and it will usually recover fully.