
Introduction to Garden Borders
Would you like to know the efficient aspects of creating a stunning border like these at West Dean in Sussex? Your garden borders are the first thing that anyone sees when they come into your garden, and they have all the colour, and they’re probably the bits you enjoy the most. So I’ve come here to West Dean to talk to head gardener and garden writer Tom Brown about how he plans a border, plants a border, keeps it going, and all the judicious editing on the way.
It’s Alexandra here from the Middle-Sized Garden website and blog. I’ll put links to West Dean in Sussex in the description below and any other resources we might mention, and there’ll be timestamps, so if you have a question you’d like answered, you can jump to that just by clicking on the timestamp. If you’re new here, the Middle-Sized Garden uploads weekly with gardening tips, ideas, and inspiration. If you want to see it when you open up the website, click the ‘share’ button, and if you’d like the website to tell you when a new article is uploaded, tap the notifications bell.
How to create stunning garden borders
About West Dean Gardens
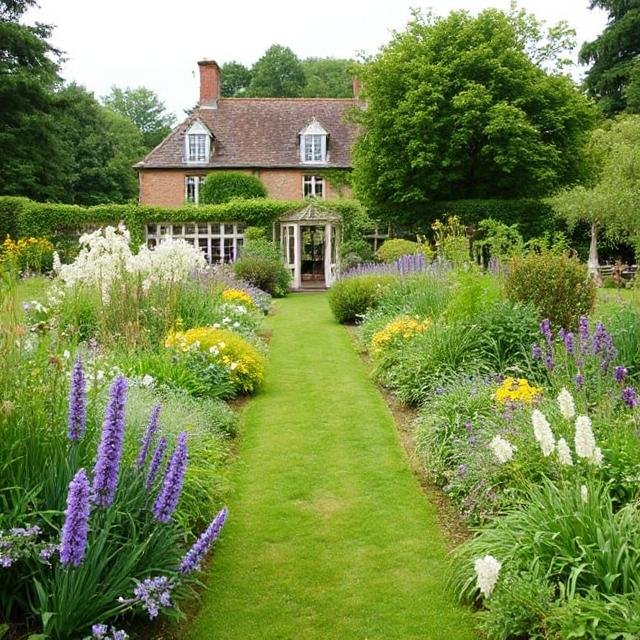
West Dean Gardens are part of West Dean College of Art and Conservation, and there has been a garden on this site since 1622. Many of the trees around here are hundreds of years old. In the early 19th century, the gardens were renovated and laid out, the walled kitchen garden was created, and some glass houses were built. At the end of the 19th century, an amazing pergola and walkway were made, and the glass houses were added.
This is a late Victorian garden laid out as it was. The storm of 1987 caused a great deal of destruction, and since then, the gardens have been restored and renovated. Tom Brown continues renovating them and bringing them into the 21st century.
Planning Your Border

Alexandra: So, Tom, what’s your starting point for creating a border? Do you list the plants that could be in that sunny or shady place, or do you start with structural plants? How do you do it?
Tom: I’ve been fortunate enough to look at different types of borders at various stages in my career. I’ve had some situations where I’ve had a complete blank canvas – an empty bed – or I’ve had a situation where I’ve got an established border that I need to embellish or enhance, but the process is pretty much the same.
So I pick a theme or a colour palette that I want to work with – or work with the existing colour palette – and identify my tall plants, medium-sized plants, short plants, and accent plants that fit within that theme or that colour palette. So I’ve got four lists on a piece of paper, then start to boil that down – and I would say trying to boil that down into probably a lot fewer than you’re comfortable with, but ultimately you end up with a real cracking list.
Creating Structure and Rhythm

Once you’ve got that shortlist and your piece of paper, you start to think, I need some height and repetition here. So at the border we’re in now, we’ve got the cardoons and the cynaras that are our accent plants at the back of the border – the tall plants if you like – and they’re repeated. So they bounce from left to right as you go down the border, because rhythm and repetition are key.
You think that rhythm and repetition are going to be the factors that decipher a good border and a great border, so often less is more in terms of planting and in terms of the message that you’re trying to get across. So put those big structural plants at the back and ensure they bounce and rhythm down the border. Then, bring some medium-sized plants, such as phlox paniculata or asters – cushion plants that will give you lots of flowers at a particular time.
Then start looking at the front of your border – so it might be the salvia nemorosa or the germanic irises that you begin to put in – and when you’re putting all these different components together, be aware of contrast whether it’s rounded foliages or sword foliage, upright or spiked flowers – like foxgloves or rounded daisy-like flowers like peonies, for example.
Try to put contrasting plants next to each other, such as contrasting foliage and contrasting flowers, because if you’ve got two plants that look the same, it’s tough for them to get your attention as you walk past. Whereas if you’ve got an upright foxglove and a nice, rounded hummock of salvia, they strangely complement each other.
Choosing a Theme

Alexandra: So, apart from colours, is there any other theme or idea you might consider when planning a border?
Tom: Yeah, the principles are pretty universal about putting plants together – it could be subtropical planting, it could be more of an arid, alpine style. Again, it’s all about working with heights, accents, and repetition because you want your eyes to work harder than your feet when you come to a border.
So if you come into a garden, let’s say, for example, Iris Jane Phillips – the lovely blue Germanic iris that’s one of my favourites – if you walk into an enclosed space. You’ve got iris Jane Phillips flowering in four or five different spots in that garden, you walk in and your eye is instantly drawn and bounces around the garden before you’ve even taken a step, and it feels much more cohesive and natural that way. So I think the principle is the same whether you work with irises or banana palms.
Planting Ratios
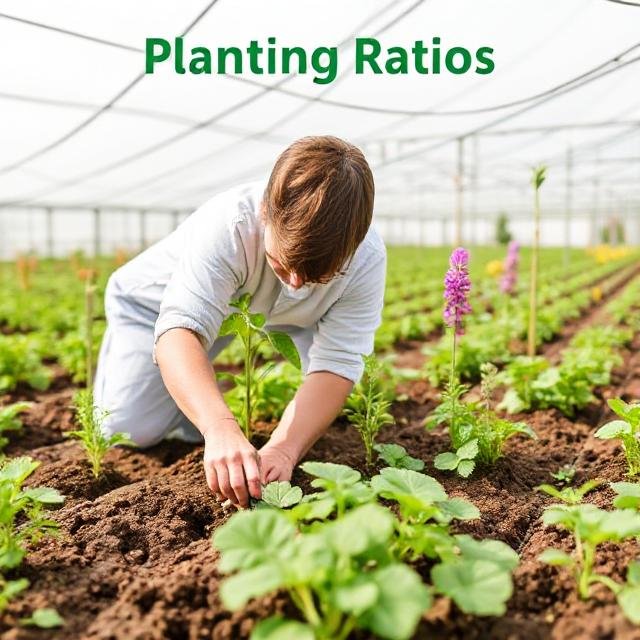
Alexandra: What percentage of the border must be perennials, annuals, or evergreens? Is there a formula, or was it just instinct?
Tom: Over the years, I’ve concluded that most plantings should be permanent, so about 80%. I say that because many of us are time poor—we haven’t got much time to spend in our garden—and also because of the cost of replacing these annuals.
So I tend to have about 80% of permanent planting. Still, then I have a cast of annuals that I will grow and pop into those borders to give me the fireworks and that lift, because when we visit gardens quite often we’ll go away and say ‘oh do you remember the alliums?’ or ‘do you remember those lovely tulips?’. You want to have a memorable element in the border, and if you can achieve that throughout the seasons, that’s verging on a very successful border.
Plant Variety and Grouping
Alexandra: Is there a rule about how many varieties of plants you can have in a border to keep it looking lush but not messy?
Tom: Sort of. I would say again, less is more. I would rather have bigger clumps of fewer plants than smaller clumps of many different plants. A border can be a pretty hostile place for plants. It’s survival of the fittest in a lot of ways.
So if you can plant things in drifts – say groups of seven, nine, eleven – you’ve got quite a substantial clump. That clump is big enough that if they’re fighting and battling with their neighbours on the edges of that clump, and you lose a couple from the edge, you still have that powerful core delivering that particular quality from the flower you want.
So… when you’re working with these borders, some plants just don’t cut the mustard, and they tend to disappear. It might be – if they look weaker and aren’t happy, then move them into another part of the garden because this particular border is a bit like a rough school playground, you know, the strongest survive. But where I’ve got cardoons in this border, and eryngiums that like the space – they like the open aspect – a couple of the cardoons have leaned forward.
The eryngiums at the front of the clump are doing quite well, but the cardoon is outcompeting the ones further back. In. In autumn, I’ll lift those and either move them clear of the cardoon or move them to another part of the garden.
Managing Plant Competition

Alexandra: There have been many questions from YouTube viewers, and quite a few people have asked what plants mingle together without looking messy. There’s this war that you speak of, or a sort of playground jostling in this border, and, how do you sort that out, and how do you prevent it from just turning into chaos?
Tom: So when I form a clump of a plant, I think of a tadpole shape – I have the main body of the clump and then the tail will often then disappear off into the back or will then dovetail into another tadpole that’s got the large clump there. Editing is critical. I usually think that than you’ve got borders,, August is a good time of year to review what’s happened because everything’s at its maximum capacity in August, so you can see how much something has spread.
But with this sort of thuggish environment, you do get the bullies on the border. Quite often I’ll go through with a notepad – and it can be quite civilized, with a gin and tonic at the end of the day – and write down and take pictures of that particular aster that’s trebled in size over the last four or five months, and then make a note to say in the autumn or the spring, reduce that back by 50 percent. You’re trying to address that balance every autumn or spring, but you’re making those notes and those photos in August.
You’re doing it well in advance because I guarantee you, when it comes to the autumn or the spring, you think, ‘Now where was that aster? How far did it go out? You do have to be the puppet master. You must have that moment when you go through the playground whistle and get everybody organized again.
Plant Successions
Alexandra: Can you recommend a good succession of plants?
Tom: Sure. With the perennial side of things, you’ve got the backbone of the border – that should be there all the time – but then I often use a cast of contenders that I want to be more fireworks-like in what they deliver in a border. Again, it’s that memorable thing that people can take away, so I would start the season, January time, by sowing things like scabiosa atropurpurea purpurea, daucus carota – the wild carrot – ammi majus, verbena bonariensis.
Just have around 20 of those that I’m growing from seed – so they don’t have to be too expensive – but they’re coming along from January because they’re hardy annual so thato you can start them quite early and they’d be looking to go into the border about end of March – when you’ve done all of your mulching and cutting down and that’s all ready to go. You then look at tulips in April or May. So, tulips would be your first big performance. They would then start to die down, and I would say to look at alliums as a success.
You can get some big, dramatic alliums and again plant them in groups of 10 or 15 throughout your planting—some at the back of the border, some at the front—because at that time of year, we don’t have the huge plants that are starting to fight for space at the back. Once your alliums are done, your scabious and daucus will begin to flower and give you that early summer colour until July or August.
Then I’m a big fan of gladioli. People often see them as old-fashioned, but an excellent selection of miniature gladioli is now available to us gardeners. They don’t need staking, and you can put them towards the front of the border. They almost act like a summer tulip, giving you that burst of colour. Again, they won’t break the bank if you order a few bulbs.
They’ll give you that flower power until September or October when the daisy family comes in – so things like the rudbeckias, the solidagos, the heliotropes, and the asters. Make sure you’ve got some of those in your border. They will pick up the baton when many other plants take deep breaths because they’re exhausted from the summer. The daisy family then says,, ‘Right, it’s our tur,n,’ and August, September, and October look tremendous.
Border Depth and Layout

Alexandra: How deep should a garden border be?
Tom: You always want to feel slightly immersed in a border. If it’s a skinny strip, you can’t play with perception and that height. I would say probably looking at – if you can – a couple of metres – two or three metres – so that you’ve got enough depth so that height can flow up and down as you look down the border. Give yourself enough room to play, I would say, and two or three meters should do that.
Alexandra: Presumably, you’d think if you’ve got a garden that’s perhaps a bit narrow, it’d be better to have a big border on one side rather than having two slightly narrower borders on either side, would you say?
Tom: I’ve got to the stage where that 360 experience is quite enjoyable. If you look at a border from, say, the lawn, and you’ve got your border and then the fence, you’re a spectator of what’s happening. If you’ve got a narrow garden, you can create a winding path that meanders left to right, then make a wider border on one side and a slightly narrow border that can echo the planting on the other, and then it flips back and reverses.
So, with a very narrow garden, you can create that depth by sacrificing the depth on the other side. When walking through a border, if you can feel slightly immersed, I think what you take away from it goes up a notch.
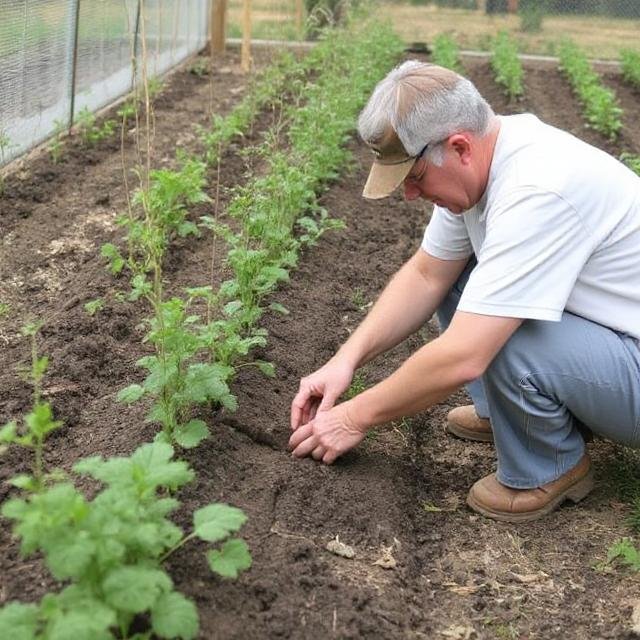
Practical Planting Tips
Alexandra: We’ll discuss the practical aspects of planting and choosing a border. One of the things that I’m pretty curious about is how you plant plants.. Do you. Ig the hole exactly the size of the root or do you digit the size of the root plus a half, which I think is usually recommended? And do you water the plants before, after, or both?
Tom: You advocate that people enter. An old boss of mine said you never get that opportunity to saturate the root ball again once it’s in the ground. So if you’re buying plants, get a small bucket, particularly in warm weather, nd drop the plant into the bucket of water until the air bubbles stop coming up. You know then that the ball is saturated. It gives it an excellent start because putting water back into the centre of that root ball is almost impossible once you’ve covered it with soil.
I like to plant smaller plants and more of them because it gives me more freedom when creating those drifts. If you’ve got three plants, it’s tough to avoid making a triangle, whereas if you’ve got seven smaller plants, you can start to get some movement with the clump. When it comes to planting, you want to think about what those roots will do.
So if you put the plant in a tin pot with compacted sides, the roots will struggle to penetrate and find the nutrition and water they need. If you’ve got a trowel and can loosen the soil around the root ball, you can loosen the soil more and u’ll find establishment is better.
So I dig a big enough hole to ensure that the establishment is successful, and when we’re planting, those first three weeks are critical. I’m always there with some water for the first three weeks to ensure things are established. Once they’re established, they tend to be happier and be able to fend for themselves rather than a little bit of water one month and a little bit of water the next month because it just drags the whole process of establishment, whereas if you can bed them in and say ‘Right, you’re on your chaps’ and get on.
Plant Spacing and Natural Patterns

Alexandra: Do we have to stick to the spacing recommended on the label?
Tom: I work at about a foot spacing. Again, work with smaller plants if you’re trying to create a clump. So, if we consider work such as phlox, you’ll find some nine-centimetre plants. So, anyhow, you can look for three individual clumps of phlox?
So, create your drift and movement with the planting, and they’ll merge. The quicker they merge and form the kind of effect that I want, the better. Then, with my editing and my gin and tonic, I’ll look at whether I need to reduce or lift and divide in a couple of years—but initially, I want that impact as soon as I can get it.
Alexandra: How do you create natural patterns or drifts without looking messy?
Tom: The art of gardening, picking up on those subtleties, and maybe removing a stem or cutting something back to allow something to come through. If you’ve got foxgloves that have maybe seeded themselves in parts of the garden, you’re not quite sure if they’re in the right place, let them flower. If they suddenly look untidy or block something, gently cut them back.
Opium poppies, again, if you’ve got these seed heads and you think ‘I don’t like that there because it’s flowing. If they suddenly pop it out. Those constant, gentle touches are the real art of gardening I thi..nk when you’re trying to orchestrate a border, little and often, just g corralling things into a space is much better than saying ‘Righ,,t, once a month I’m going to come in here and bang some heads together and sort people out’.
If you can get into that hthe of gently making sure that everything is where it should be, and f something looks out of place, a littgive it le trim. Plants recover much quicker from a bit of trim rather than
Tips for Amateur Gardeners
Alexandra: Do you think, considering that you’ve got years of expertise and professional gardeners here as well, that it’s a case of what to get the full, gorgeous, colourful borders? And if so, are there any tips to help an amateur garden achieve some of this professional look, without going to a horticultural college for three years?
Tom: I think it’s always easier to curtail grlookthan encourage it too much, so I think fertility is We’re asking our plants to do an awful lot in these borders, so looking at mulching, for example, in the spring, giving them a nice layer of the amenity compost, the local council compost, can be incredibly rich and inexpensive. If there’s a way that you can cut your borders down and then put a reasonable layer of mulch on every spring, that will gently increase the fertility – you’ll find your plants are a lot more buoyant.
With our homemade cocompost similar to the amenity stuff I used, I would take on another level of vigour. So I would sa,y if you can, get that fertility into your soil. E very year, you’ll finda nice layer of mmulchnd basfertility will bubuild upfter a few years—th e you’lllget wingg effect you often see in professional gardens.
Staking Plants
Alexandra: So what about staking? I’ve had questions from people saying their plants flop forward or over each other.
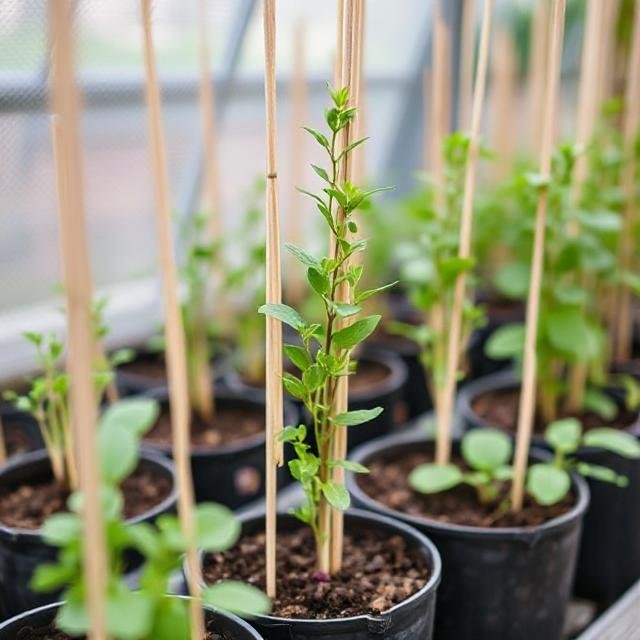
Tom: Staking’s one of those things that if you can get to it early, it makes all the difference, and everything is so much easier early in the season. It’s difficult to remedy a plant that’s decided to take a tumble forward without it looking completely strung up for the next month or so.
So I would say that as the young shoots start to emerge in April, it’s a good time to get in with your staking—whether that be bamboo canes and string, birch or hazel, or even the plastic or plastic-coated metal rods that you can use to support perennials—get in there nice and early.
As long as it’s done in a way that the plants will outgrow the staking for exa e, if we’ve got a nice mound of geraniums coming up through, as long as the birch is at the right height that the get,,m will then protrude out from the staking. It doesn’t look as if it’s overly trussed up, so that’s the way to go.
But go early. If you’ve had problems with that plant in the past, go more extreme because quite often, a plant will hide the staking in the tough drag it back into some soder isoildecides to take a tumble.
Conclusion
Alexandra: If you’d like to see more articles about flower colour in your garden, there’s a flower colour playlist at the end of this article. Share on the Middle-Sized Garden website for more tips, ideas, and inspiration. Thank you for reading; goodbye!